Post 133: Composting Toilet
This is one of several posts that will cover our preparations for spending the winter in Ontario Canada. The Farmers Almanac predicts the following for the area of Ontario we are staying in.
Borrowed from their website: Winter temperatures will be close to normal, on average, with above-normal precipitation and snowfall. The coldest periods will be in mid- and late December, early and late January, and early February. The snowiest periods will be in early December, mid-February, and early to mid-March.

Nov, 2018 Composting Toilet
We have been aware of Composting Toilets since we started full time RVing. However up to now there has always been some project higher on the priority list. Or we were not in a position / place to build one.
For example; Up until now, when we boondocked we usually were in a location for a few days, maybe up to a week. In which case our black water tank can hold all the waste. Then on our way to the next destination we found a dumping station to get rid of the black water.
Even when we were in the desert for several months dry camping, we were able to use the 55 gal barrel to dump the waste tanks.
Now that we are dry camping over the winter, with the cold ‘freezing’ temperatures up here in Canada. Dry camping brings a whole new complexity to the black water removal. We can’t use the 55 gallon black waste water barrel to dump the black tank simply because there is nowhere to empty the black water near us during the winter months.
There is also that fact, that conventional toilets use a lot of fresh water to flush along with some sort of chemical to breakdown the solids. We would rather conserve the fresh water by using the composting toilet. The added benefit is composting our human ‘waste’ which is better for the environment.
Composting Toilet Research
I’m sure there was an easier way to build a composting toilet, however our guiding principle is to use whatever tools and materials we have on hand if possible. If we don’t have a specific tool, we look around for what works, on the materials we have. As a last resort, we will purchase new or use recycled materials when we don’t have anything on hand.
There are many websites that have extensive information about composting toilets and how to deal with the human waste. Rather than repeat all the “whys” and “how-to’s”, here is a link to a comprehensive website on the subject.
Initially we were going to build the container for the composting toilet large enough that we could store the peat moss, toilet paper and the bucket for the waste inside the container. However after measuring it all out several times, building a container large enough would really cut into the floorspace of our already small bathroom.
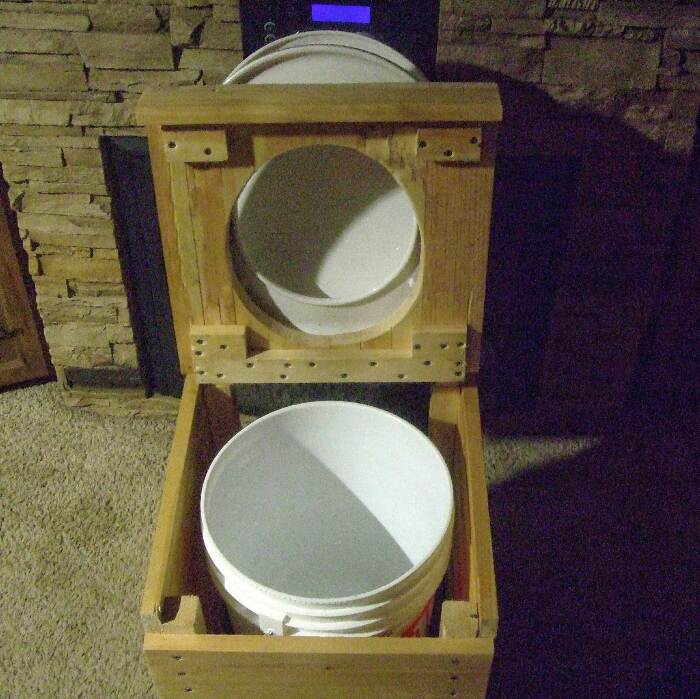
In the end, we decided on a container that is large enough to hold the 5 gallon bucket and a regular size toilet seat.
Research results
After many hours of research on composting toilets we have come to the following conclusions:
- There is conflicting information regarding mixing urine and feces. Some say it is “OK”, other sources say mixing urine and feces will cause smells and flies. After reading quite a bit on this, we have decided to combine the different thoughts; The toilet will have a bucket for feces and Joy’s urine. There will be a separate container for Bill’s urine when he is ‘standing up’ to urinate. The container for Bill’s urine will be built in such a way it is easy to empty. After urinating, the funnel will be sprayed with a water/vinegar mixture. The rationale for this is Bill drinks a lot more fluids than Joy and therefore “urinates” more often. Diverting Bill’s urine from the composting bucket is a simple process and makes sense to us.
- Initially we were going to use pine shavings as a covering material for the stool – however after pricing out the pine shavings, the pine shavings were price prohibitive ($36 / bag) so we decided to use peat moss. Based on what we read, Sphagnum Peat Moss is strongly recommended. Rather than research why Sphagnum Peat Moss is suggested, we just went with that requirement for now. Something we will look into later.
- Joy prefers the peatmoss because there is no strong order where the pine shavings have a strong scent that she finds makes her sneeze.
Design & Build of Composting Toilet
As mentioned earlier, there are many websites with detailed directions – for example farmingmybackyard.com.
In our case, we built the frame out of 2” x 2” spruce (because we happened to have some lying around). The container is 17.5” tall 15” wide and 17.5 “ deep. Roughly the same size as our flushable toilet that we are replacing. (We kept the original toilet and it is now in storage)
To cover the frame (top, sides and front), we used 1” x 2” spruce. We cut all timber with a hand saw (for some reason my cuts are straighter with a hand saw than they are with a circular saw).
Using the new toilet seat we purchased, we traced out the hole on the top surface and cut out the hole with a jig saw (we added the necessary bracing under the 1″ x 2″ boards to ensure there was enough support to hold us sitting on the toilet seat). We placed the hole directly above the bucket so there was no overlap and potential for accidental misses of the bucket.
We finished the container by painting it with a clear laquer to seal the wood – in an effort to keep stains and odors away.
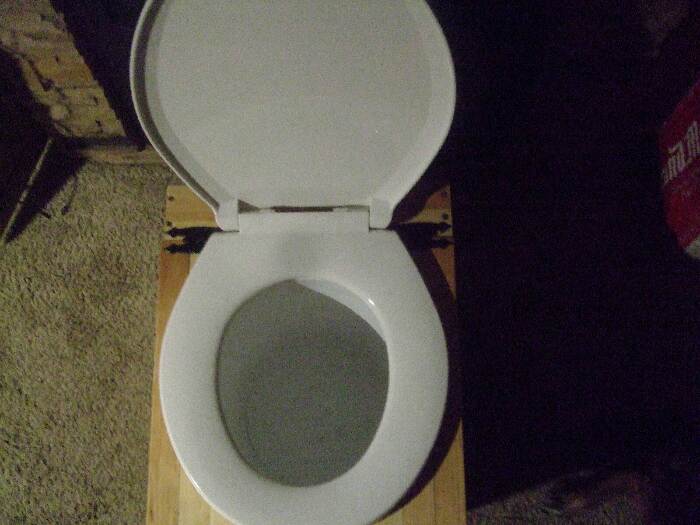
Finally, we installed the toilet seat.
Installation of the new Composting Toilet
Installing the composting toilet was actually a lot simpler than we expected. To remove the existing toilet we:
- Ensured the black water tank was as empty as we could get it.
- Then we turned the water off! Once the water was shut off, we opened the cold water tap in the bathroom to release any pressure that might be in the water lines.
- Next we removed the two nuts from the bolts on either side of the toilet base (the bolts that secured the toilet to the floor).
- Then we disconnected the water hose and capped the line so it would not leak when we turned the water back on.
- We then removed the toilet and set it outside.
- Now we were looking at a 3″ hole in our bathroom floor where the flange is. Before sealing the hole, as a precaution (in case there was still some liquid in the black tank) we poured a litre of plumbers antifreeze into the black tank.
- Finally, we trimmed a piece of plastic to be just a bit larger than the toilet flange, applied some silicone to the flange and screwed the plastic in place. This seal will hopefully seal in any black tank odours.
Once we were satisfied the hole was sealed and there were no water pipe leaks, we simply placed the new composting toilet container in place! We had designed the composting toilet container in such a manner that the bucket was a few inches off the floor – allowing enough clearance for the toilet flange.
How we use the Composting Toilet
Some folks just use the bucket as is (without any lining), however we decided to put a heavy duty garbage back in the 5 gallon bucket first. Once the bag is in place we line the bottom with about 2″ of peat moss. Anytime we use the composting toilet, we cover ‘our business’ with the peat moss. As long as we keep the feces covered there should be no smell or flies.
We keep the peat moss in a covered container beside the toilet with a scoop on top of the container. We believe the container is normally used for clothes detergent so the scoop fits on the top quite nicely and the top lid comes off easily to scoop out the peat moss as needed. It is the perfect size to fit in between the wall and the toilet.
Once the bag (or composting toilet is full) we remove the bag and take it to our composting pile. There we empty the bag out and place leaves over the peat moss and feces etc. Let the composting begin. Then we simply insert a new plastic garbage bag into the bucket. Dump in 2″ of peat moss and begin the process all over again.
Results 1.5 months later
It is hard to believe, but we have less odors now than we had with the flush toilet!
At the time of this post, we have been using the composting toilet for 1.5 months and the results are amazing.
no smell – no flies – saves fresh water
An added benefit is we do not have to dump the black water tank!
The one bit of surprise was that we need to empty the bucket every 7 days or so. Based on the research we did, folks indicated they emptied the composting tank (bucket) every 10 to 14 days. Maybe they were using larger buckets or perhaps less peat moss. Regardless, seven days is OK with us based on the other savings we have realized.


Post 31A: LED Lights Save Power!

Post 131A: Whoa – Wait – winter! Are we ready for this?

Post 30: USA and Canadian Road Laws for RV towing
About Author
asnailslife
We are a mature couple that became full time RVers in May 2017. After RVing for 3 + years we are transitioning to selling our RV and truck and moving onto a sailboat. We hope to sail around Vancouver Island and then head south to Mexico for the winters. We hope you find our posts interesting.