Post 134: DIY Wood Stove
Prolog to post…
This is a post related to our decision to dry camp in Ontario, Canada for the 2018 / 2019 winter and the steps we have taken to remain warm in -20 celsius weather.
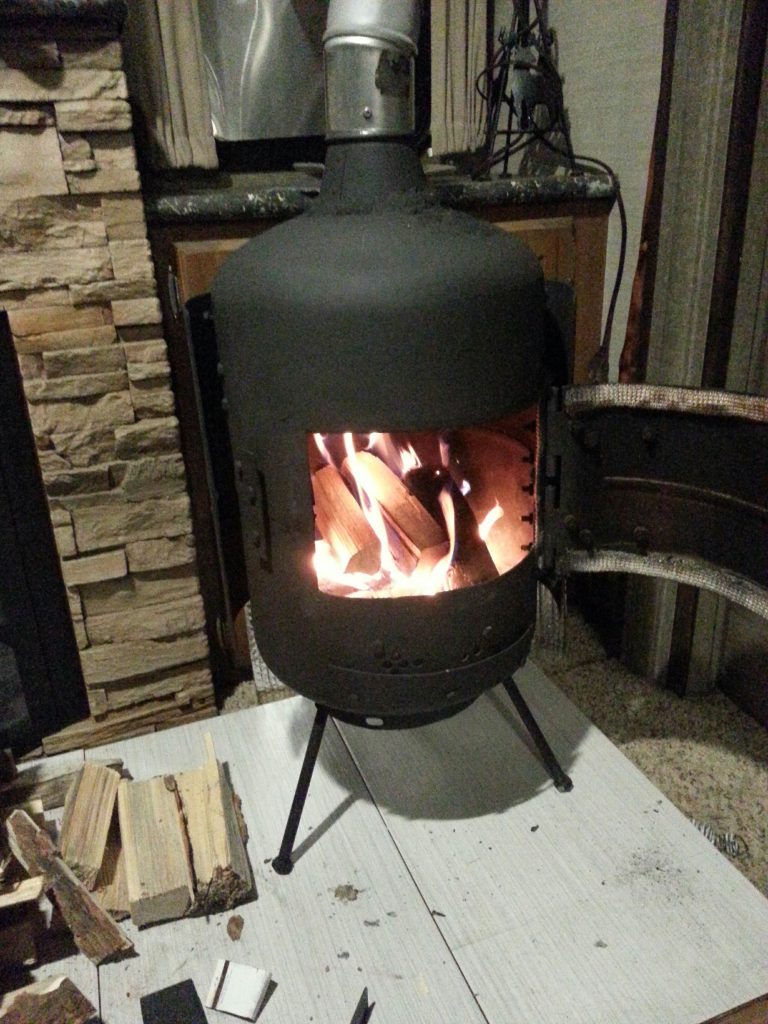
We have actually been using the wood stove for almost two months now. It has taken us this long to publish the post because we were not pleased with the performance of the stove. Over the two months, we have tweaked the design until we now have a finished product we are happy with. You will notice in some pictures the stove looks all bright and clean, while other pictures clearly show a stove that has been used. That is because we took a few pictures early in the process and then some pictures after we had been using the stove for a while.
Please note – if you decide to install a wood stove in your RV be aware of the risks – potentially your RV insurance will no longer cover your rig.
Wood stove in an RV?
The internet is a great place for ideas – Just check the facts!
We have looked at many wood stove ideas, models and types for RVs. There is the Cub and Grizzly wood stoves (made in Canada), however, they seemed a bit pricey.
We read dozens of articles on RV wood stoves. The most efficient, The most popular, The Top ’10’, The Top ‘5’ and most recently The Top ‘3’. This last one, ‘Top 3’, was our favorite. It provided a great summary on 3 inexpensive stoves. We needed to research further, but the article set us off in the right direction.
For specific information and/or measurements on the wood stove, please send us an email. We will do best to answer.
Decision Made
After much research and contemplating, we decided to build our own wood stove! We built the wood stove out of 30 lb propane tanks.
We found a propane dealer 30 km from us. This dealer sells propane and also “just about” gives away expired tanks. We purchased four 30 lb tanks and two 20 lb tanks for $5!
We studied many youtube videos on wood stoves. Here is an example of one of the videos we watched.
High Level Design
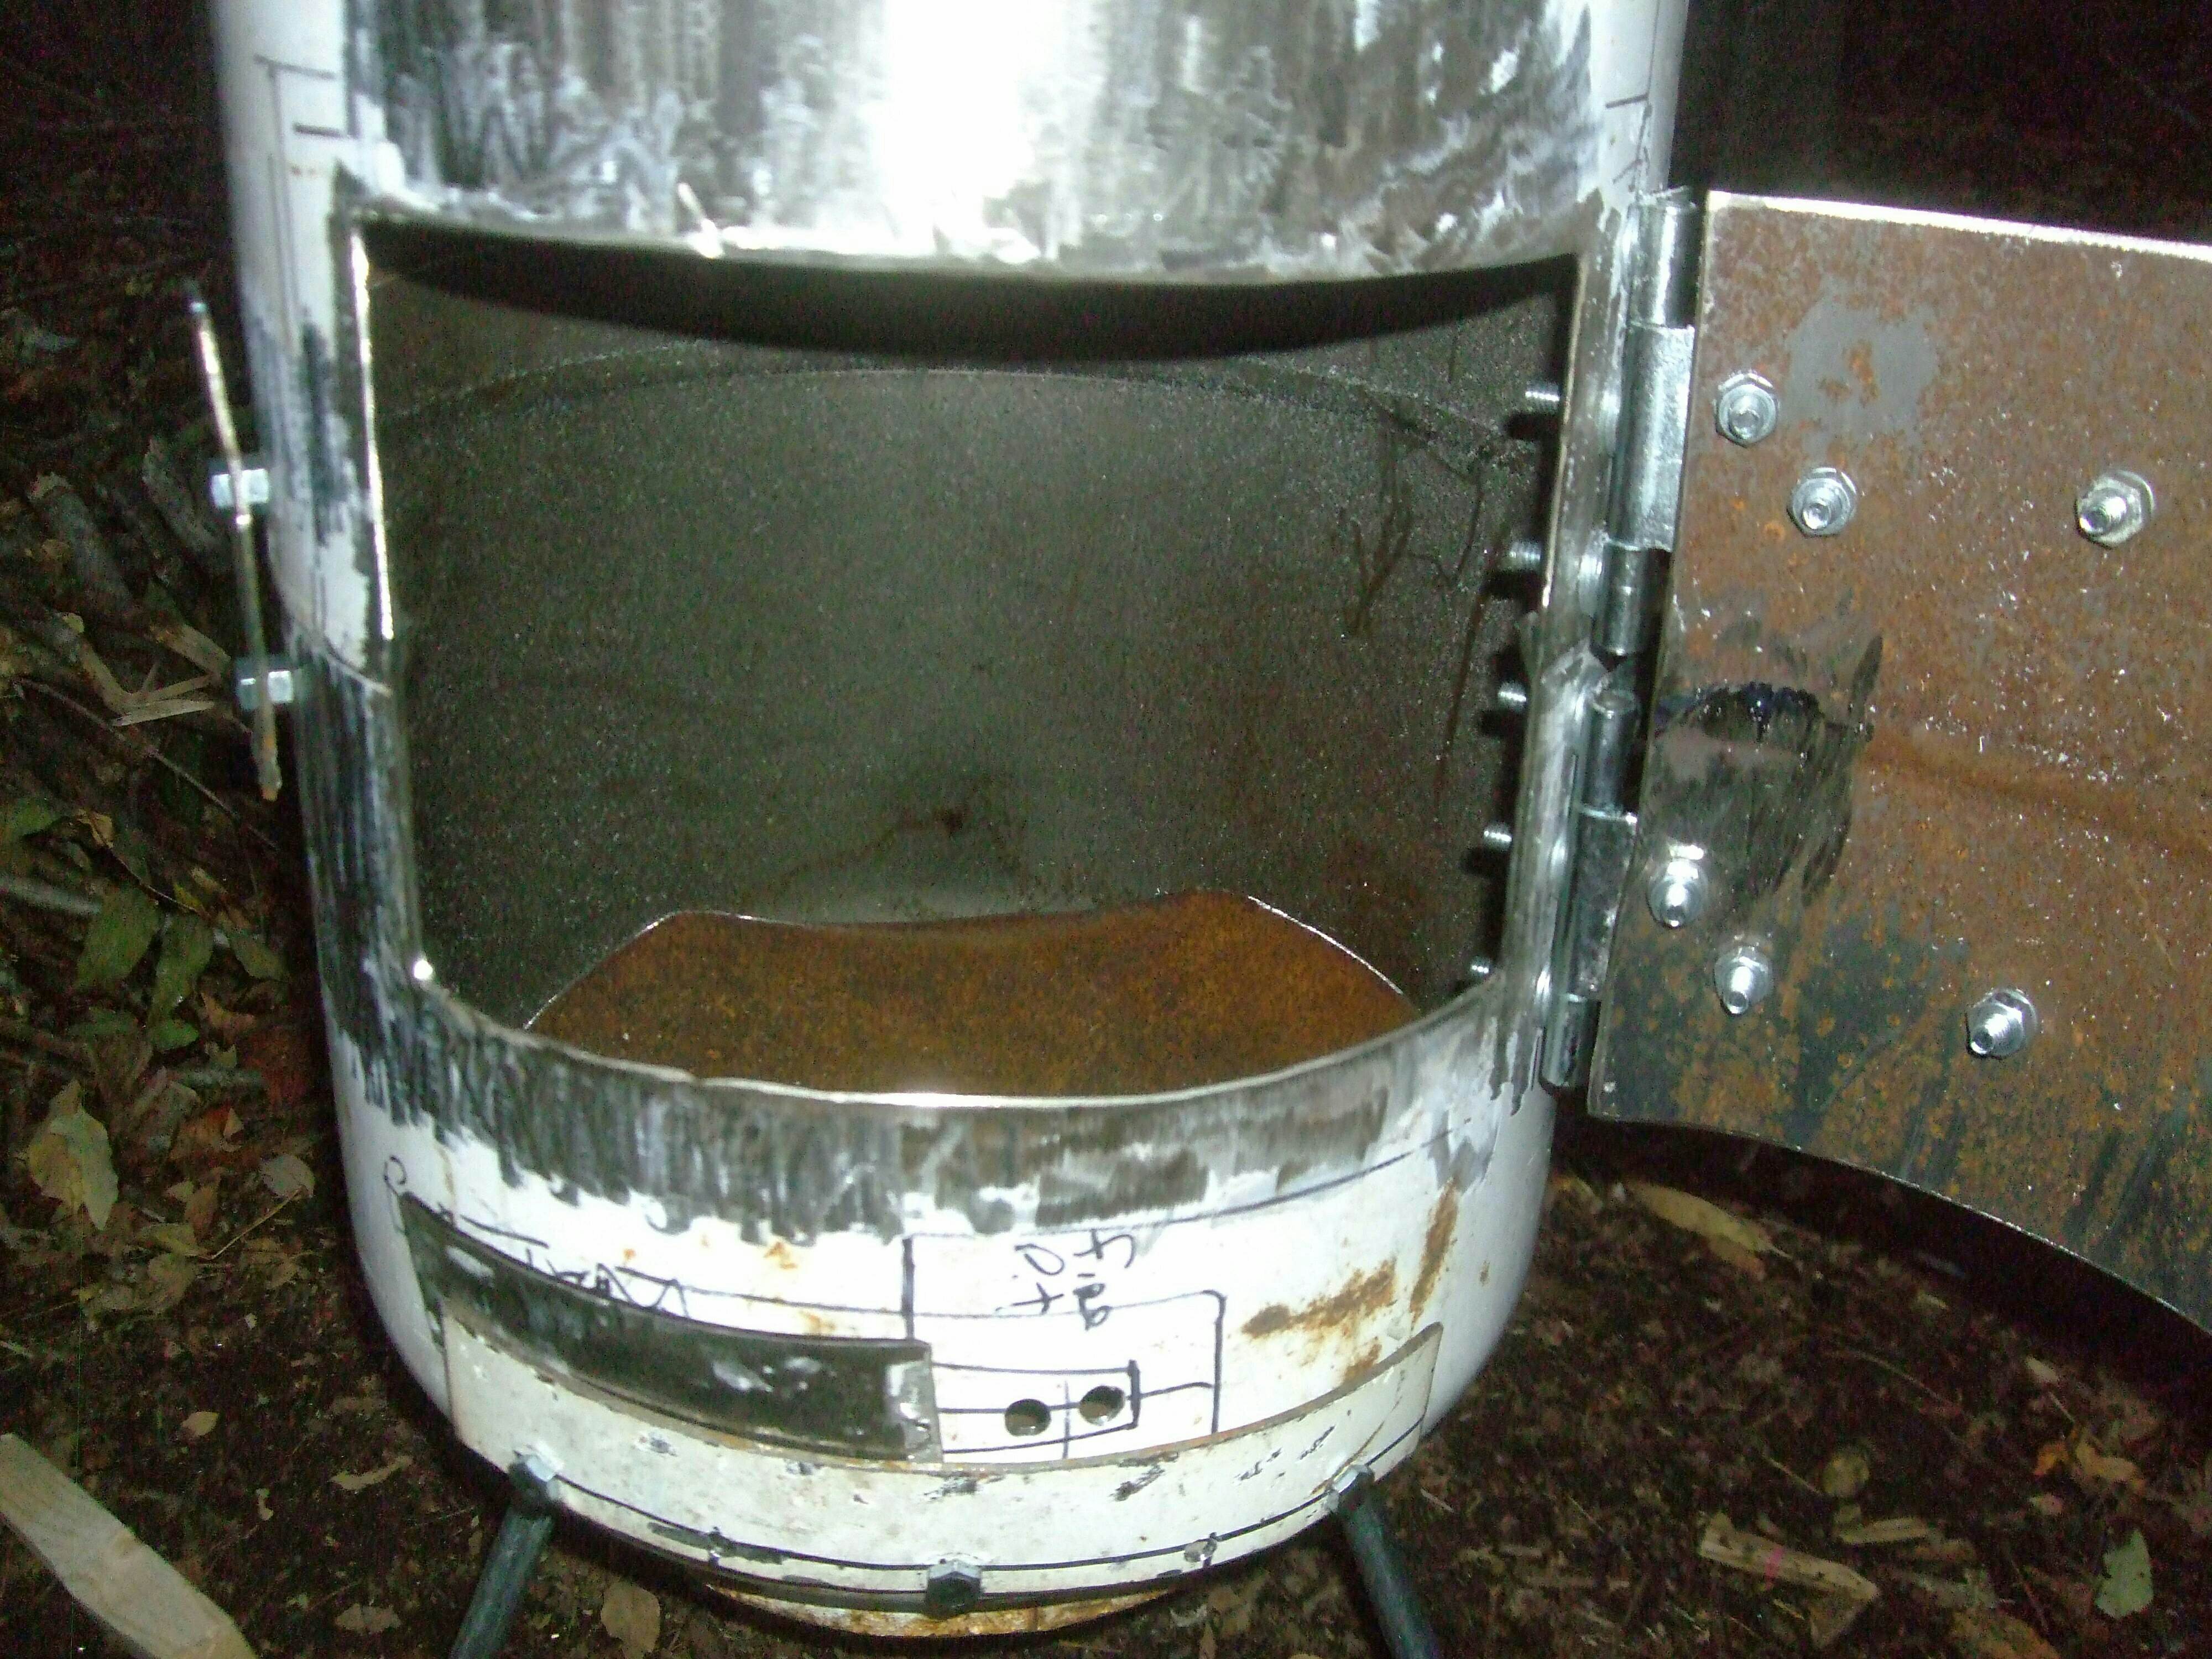
It started out as a simple design, but morphed into a bit more complex design. Below is a photo of the partially assembled wood stove before it was sanded and painted. In the photo you can see the loading hole, door and hinges, closing clasp. The grate is the rusty oval piece of metal in the bottom of the tank, and the beginnings of the fresh air vent.
How our wood stove was made
Our wood stove was made from two 30 lb tanks;
1. In the primary tank we cut out the hole for loading the wood.
This primary tank is the body of the stove. The measurements of the loading hole are approximately 6″ tall by 11″ wide.
2. A 3″ diameter hole was cut in the top of the tank (using an angle grinder) for the chimney.
3. The 2nd tank was used to fabricate the various add on components which included:
Additional components from 2nd tank
– The actual door for the primary tank (the door was cut larger than the hole cut in the primary tank – the door measures 11.5″ by 7″.
– A heat shield for the side / back of the primary tank 26″ wide by 14″ tall (we had to grind vertical ‘ribs’ into the heat shield in order to spread it out a bit to fit around the primary tank).
– A baffle to block the flames from entering the chimney and to cause the gases to burn off creating more heat and a cleaner burn.
– A 1.5” x 5” piece of metal to provide an inside shield for the cold air vent (to ensure no sparks ‘pop’ out of the vent).
-A second 1.5″ x 5″ piece of metal to provide a holder for the fresh air ‘door’ (mounted on the outside of the tank, just under the cold air vent).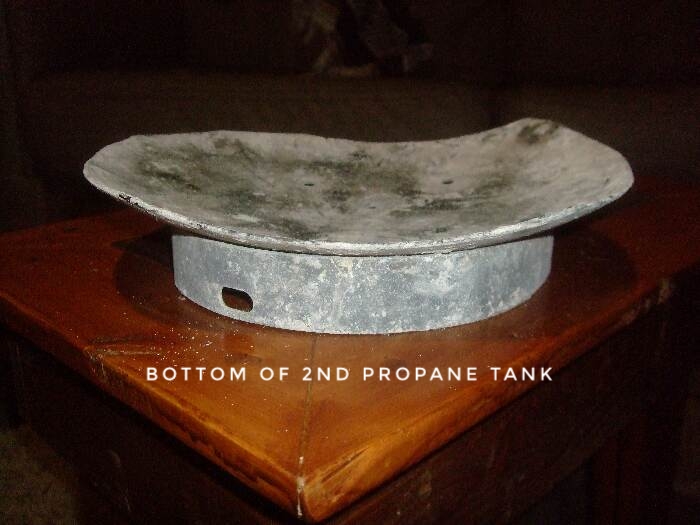 –
– 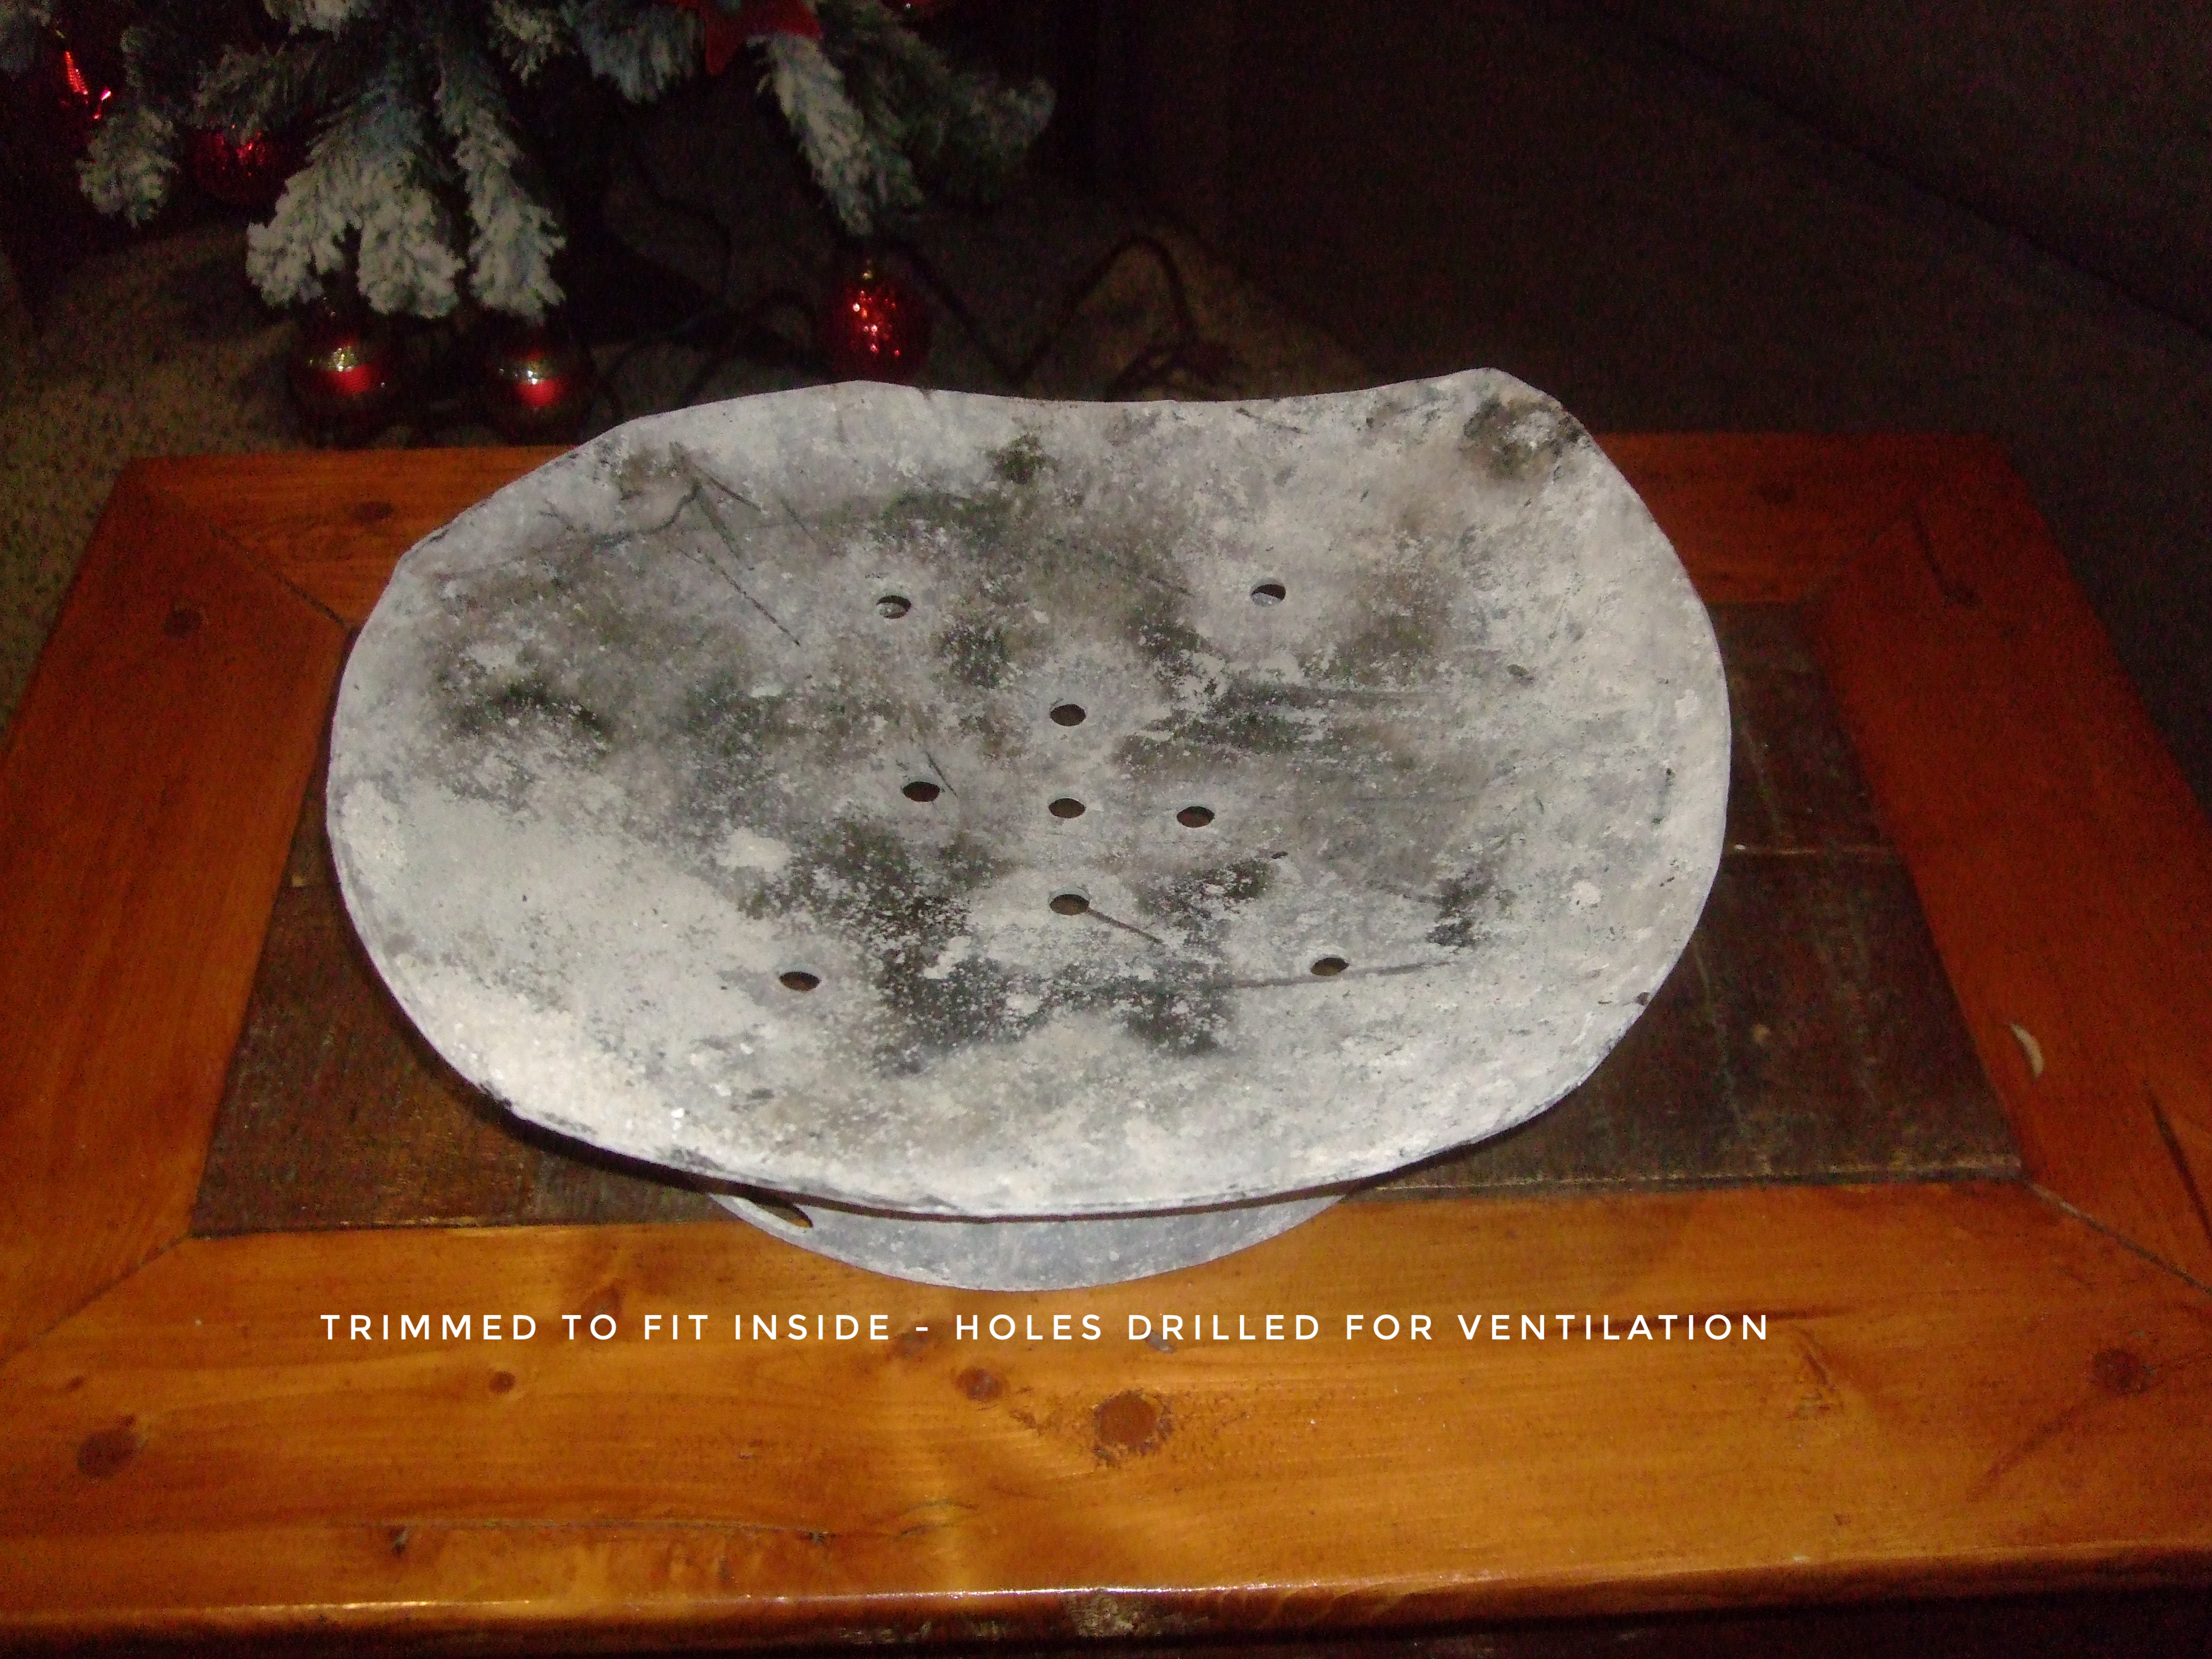 A grate for the firewood to sit on (the firewood in placed on this grate (the grate keeps the direct heat off of the bottom of the main tank and lets air circulate around the burning firewood). The grate was made out of the bottom of the second tank.
– A 1” x 4” piece of metal for the door handle to hold the door closed and a 1” x 3” peice to latch the door handle to.
What we needed to purchase
We purchased the following hardware:
– Three 5/16″ x 6” bolts for the legs
– Two 3” hinges
– Many 1/4” nuts, bolts, flat & lock nut washers
– Wood Stove cement
– High Heat silicone
– 3” stove pipe (eventually replaced with 6″ stove pipe)
– High Temperature wood stove paint (colour of your choice – we picked flat black).
– Gasket material (and glue) to seal the door
Changes to initial design
Initially we experienced excessive smoke coming out of the loading door. In order to eliminate the smoke we tried several design changes:
- The size of the loading door, we made it a bit smaller by bolting on extra pieces of metal to the top and sides of the loading hole in an attempt to reduce the smoke. The smaller loading door made no difference, we still had smoke.
- We tried raising the wood grate by 1.5″ – it made no difference.
- We tried removing the baffle, still no difference with the smoke
- Finally, we increased the size of the chimney to 6″. We were able to remove the extra metal around the door, reinstalled the baffle and lowered the grate to its original position and the result was ‘zero’ smoke escaping the wood stove through the loading door.
- The final change we made was to install bricks under the grate – the bricks retain heat for a while after the fire burns out.
Wood?
The size of the wood you use in a propane wood stove is something to think about. A wood stove made out of a propane tank (standing vertical) is just under 12 inches wide. Therefore, the length of the wood you can use in the wood stove is around 10″ long. If you are like us you purchase wood by the cord. The wood is already cut in 15 or 16 inch lengths. This is far too thick and long to fit in the propane wood stove. We have to chop the bigger face cord pieces into skinny pieces before cutting the pieces in half – great exercise!
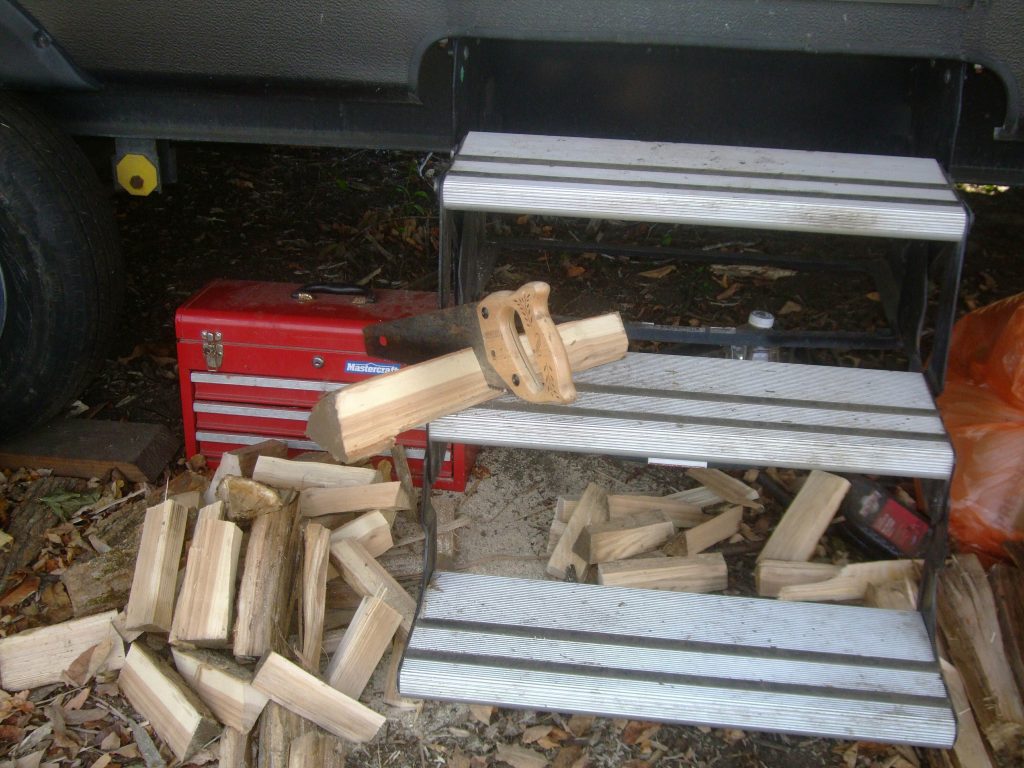
When we cut our own trees, we simply cut the pieces into 8 to 10 inch lengths.
If we burn the wood stove all day (8am to 10pm) we will use approximately 6 – 8 ‘full sized pieces’ of wood.
In Closing
We mentioned at the start of the post, we have been using the wood stove for about two months. We now feel that;
Overall it was fairly easy to build. If you are prepared to build, the wood stove may be built in a day or two.
Once we resolved the smoke issue by installing the larger chimney, we also started using dry hardwood. We are very pleased with the performance of the wood stove.
We have experienced -20 celsius temperatures and we are cozy inside the RV. The temperature inside the RV is in the low 20’s celsius.
The size of the stove is perfect, not too heavy and does not take up too much room in the RV. As a bonus, once the cold weather is over, we will be able to remove the wood stove from the RV.
Post 38: Insurance for our Travel Trailer
Post 30: USA and Canadian Road Laws for RV towing
Post 31A: LED Lights Save Power!
About Author
asnailslife
We are a mature couple that became full time RVers in May 2017. After RVing for over three years we have transitioned to living on a 28' sailboat and are currently exploring Vancouver Island located in the province of British Columbia, Canada. We hope you find our posts interesting.